It doesn’t matter whether you are shooting food from a trendy new restaurant or a chicken roasted by your significant other – your food photos should always be as mouth-watering and inspiring as the real dish is. Your “good taste” and unique photographing style are always crucial when comes to creating “tasty” snaps. However, if for some reason your images fall short, you can still enhance them in the so-called “post-production process.”
Being able to effectively use Lightroom or Photoshop as editing tools for your food images is just as important as knowing how to use photo equipment… and that’s why we would like to share with you a few practical food photography editing tips on how to improve your food photos using Photoshop.
3 Ways to Make Food Photography Editing in Photoshop
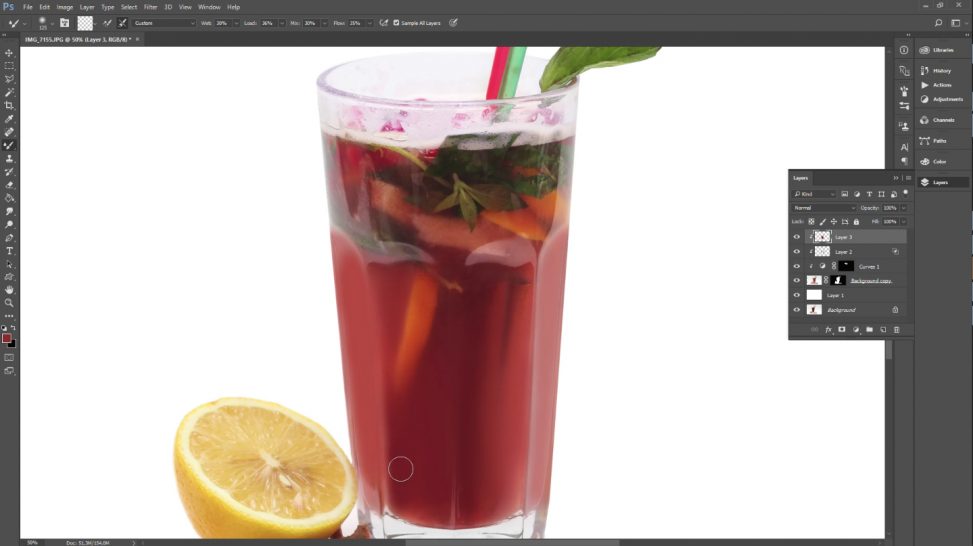
Lesson 1
-
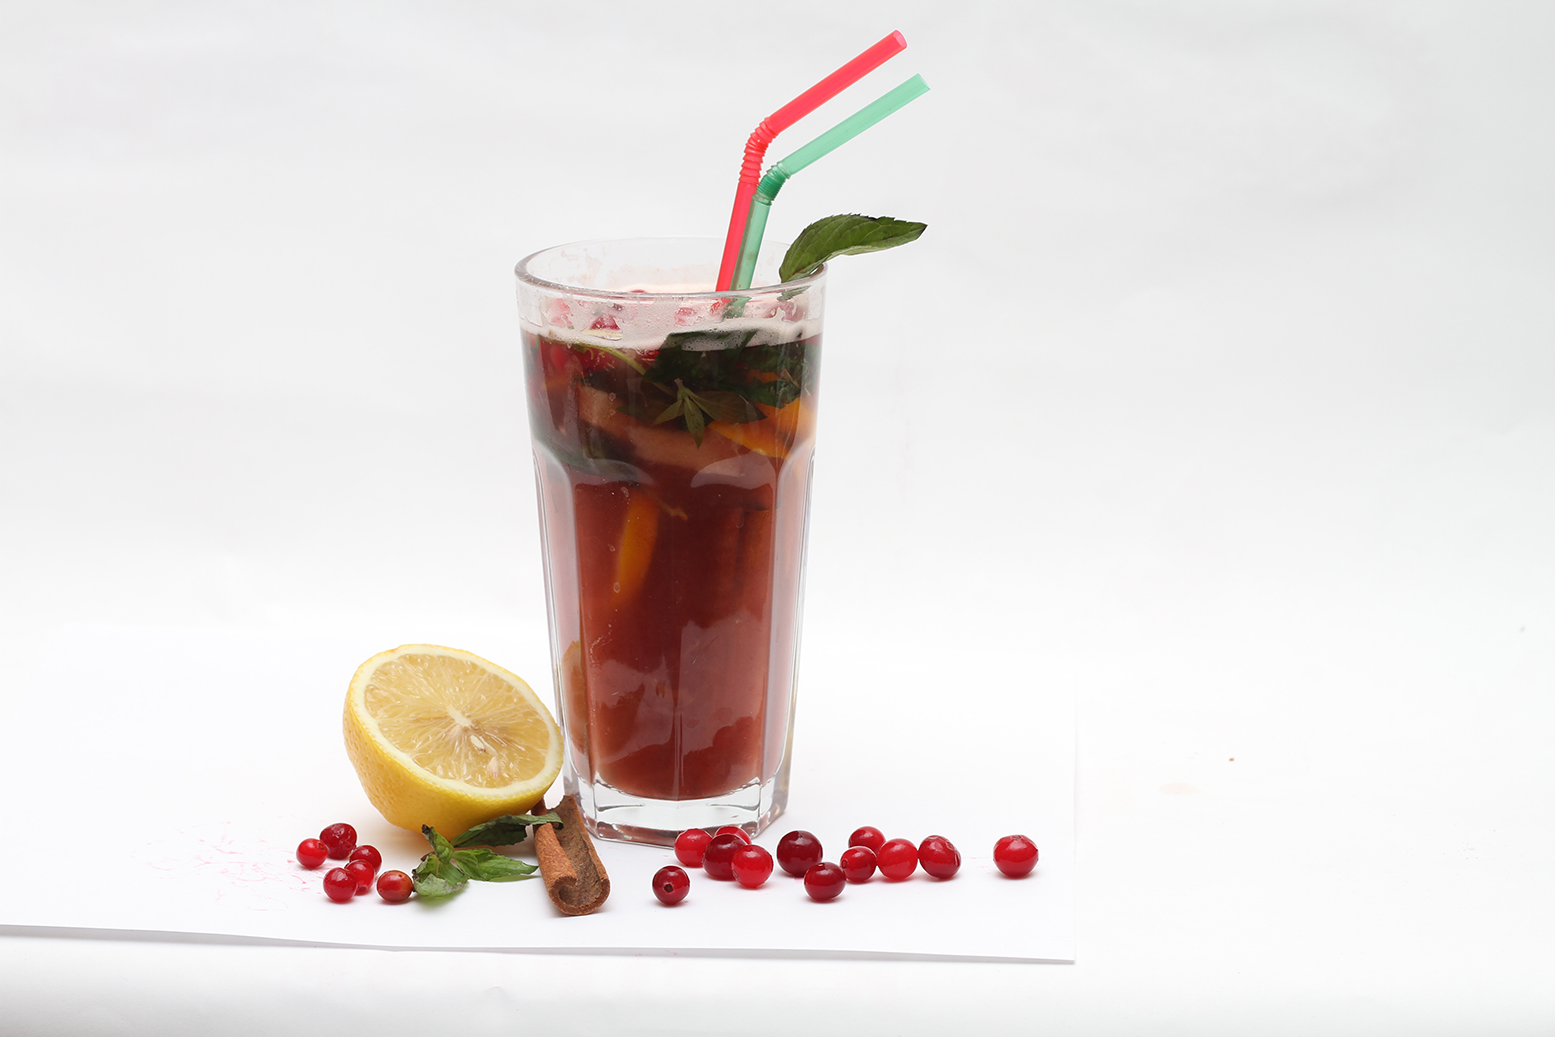
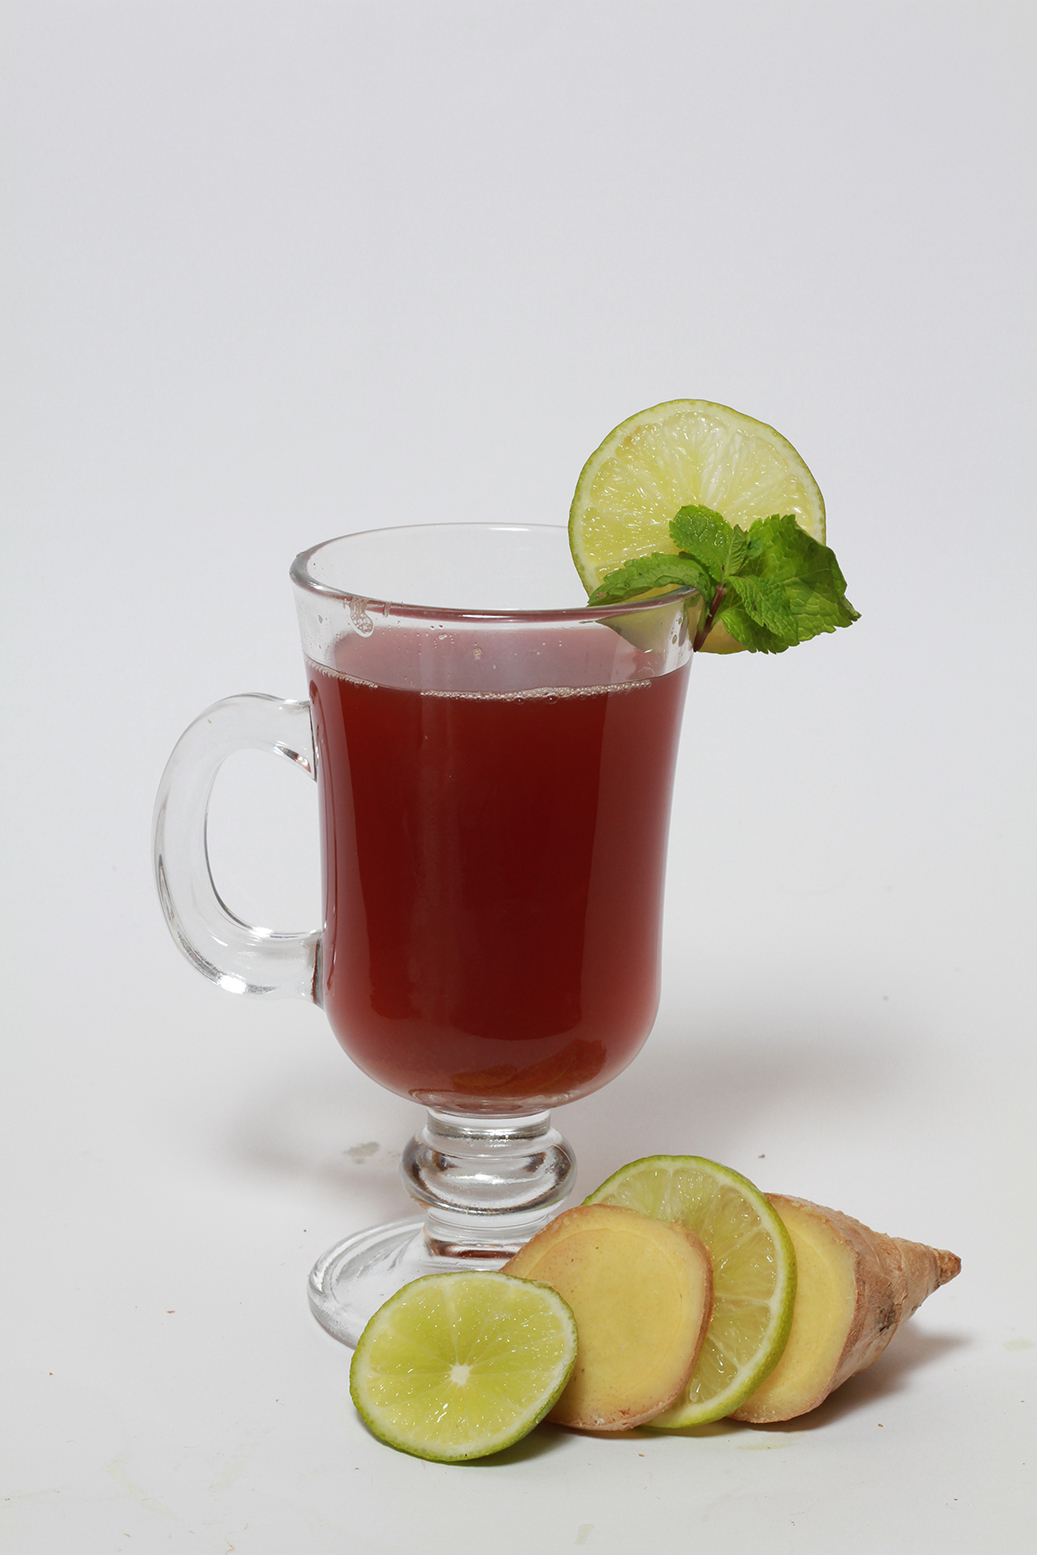
- Before
-
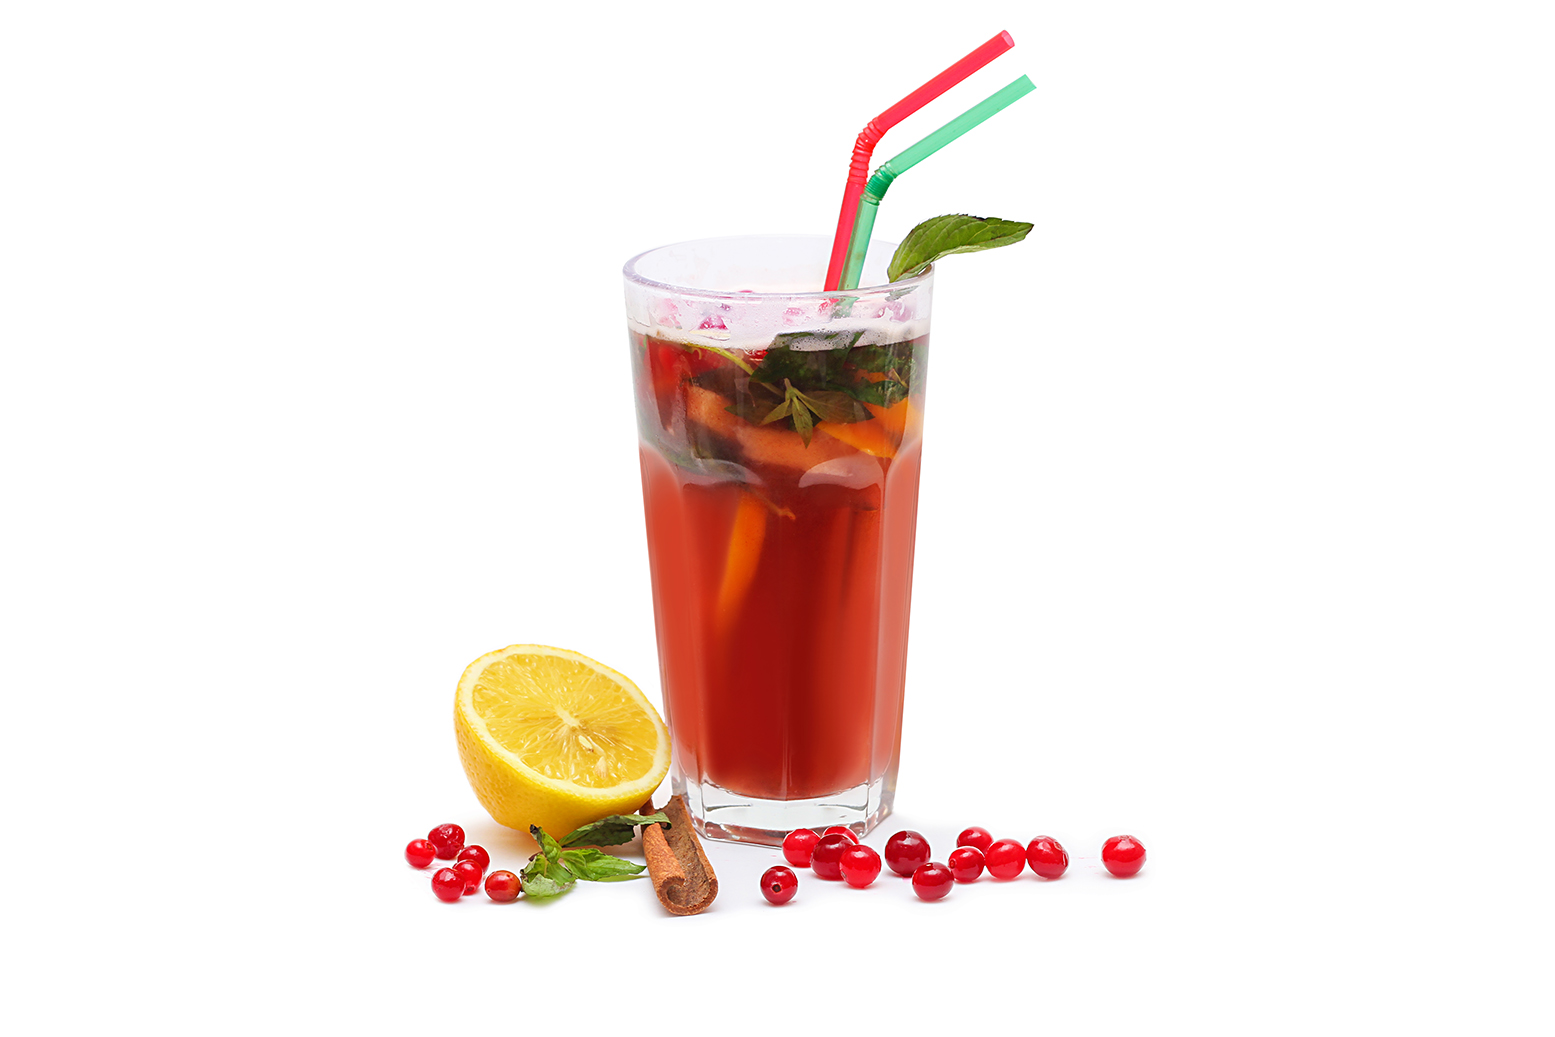
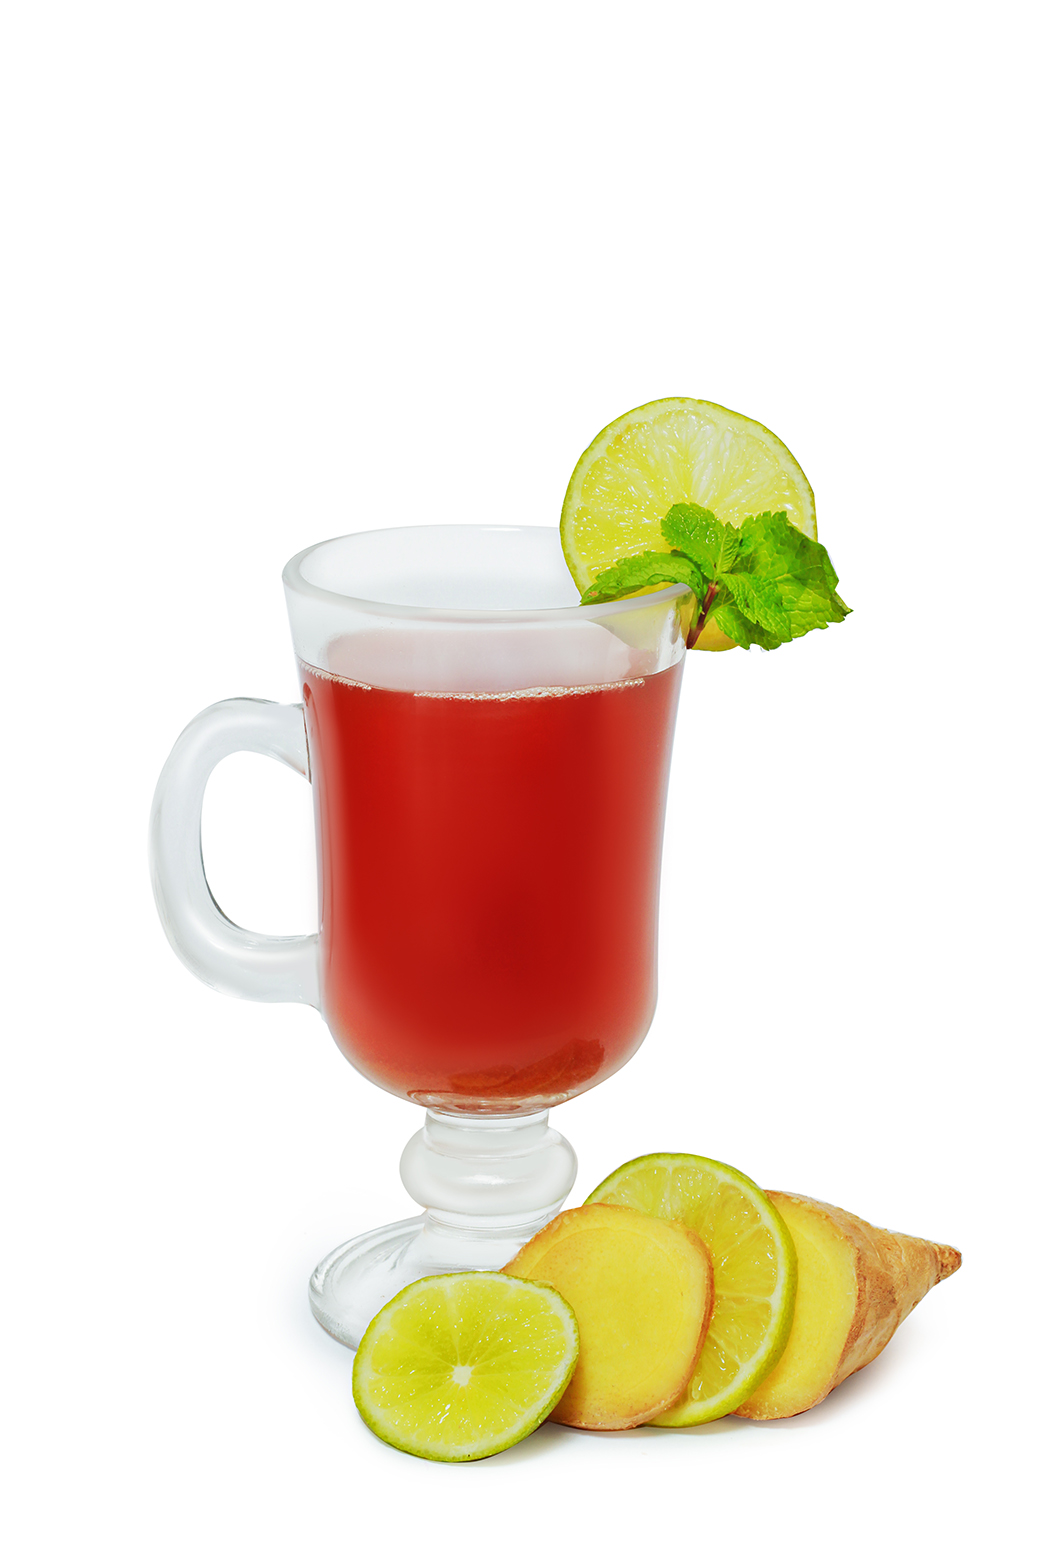
- After
Step 1. Create the Background copy in the Layers window.
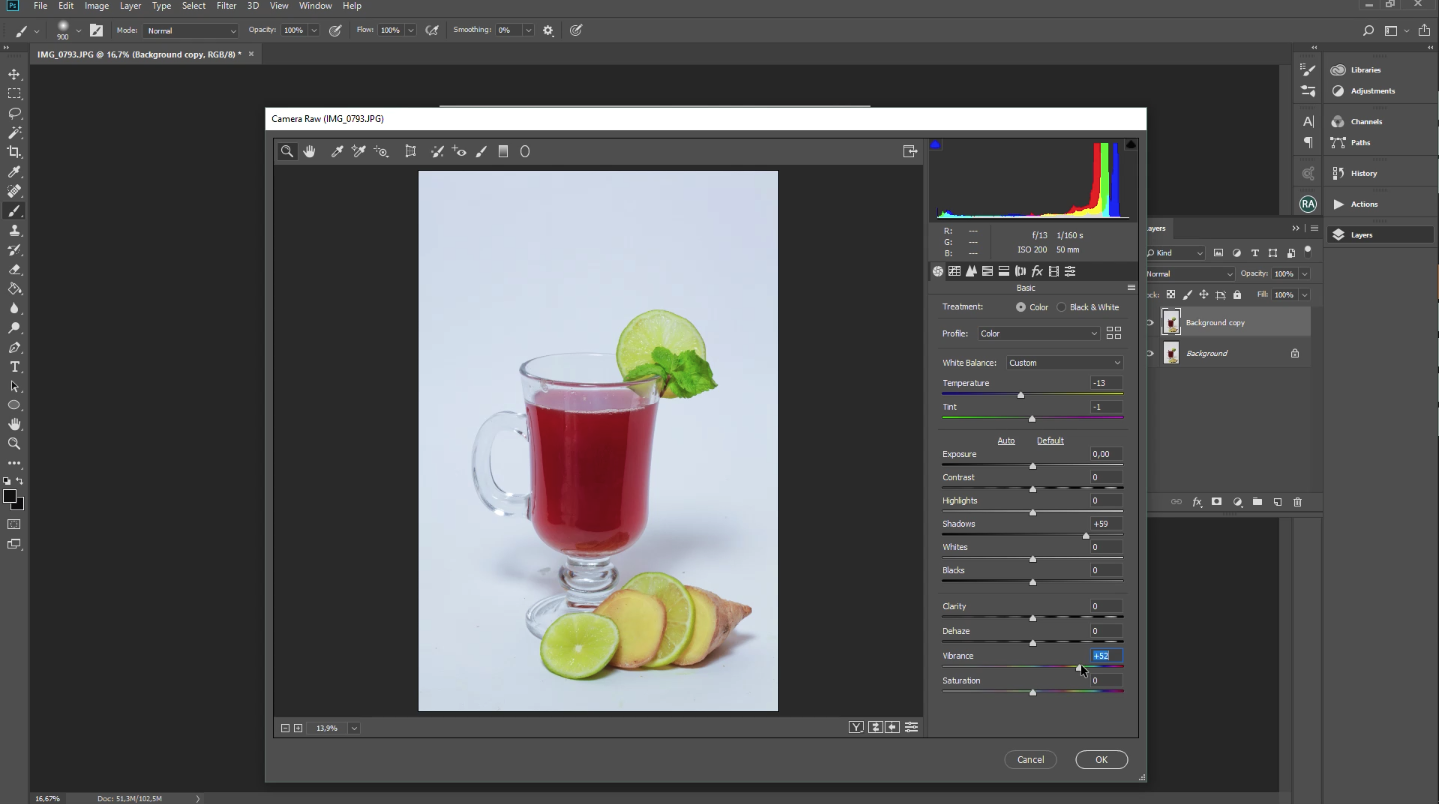
Step 2. Adjust basic color parameters.
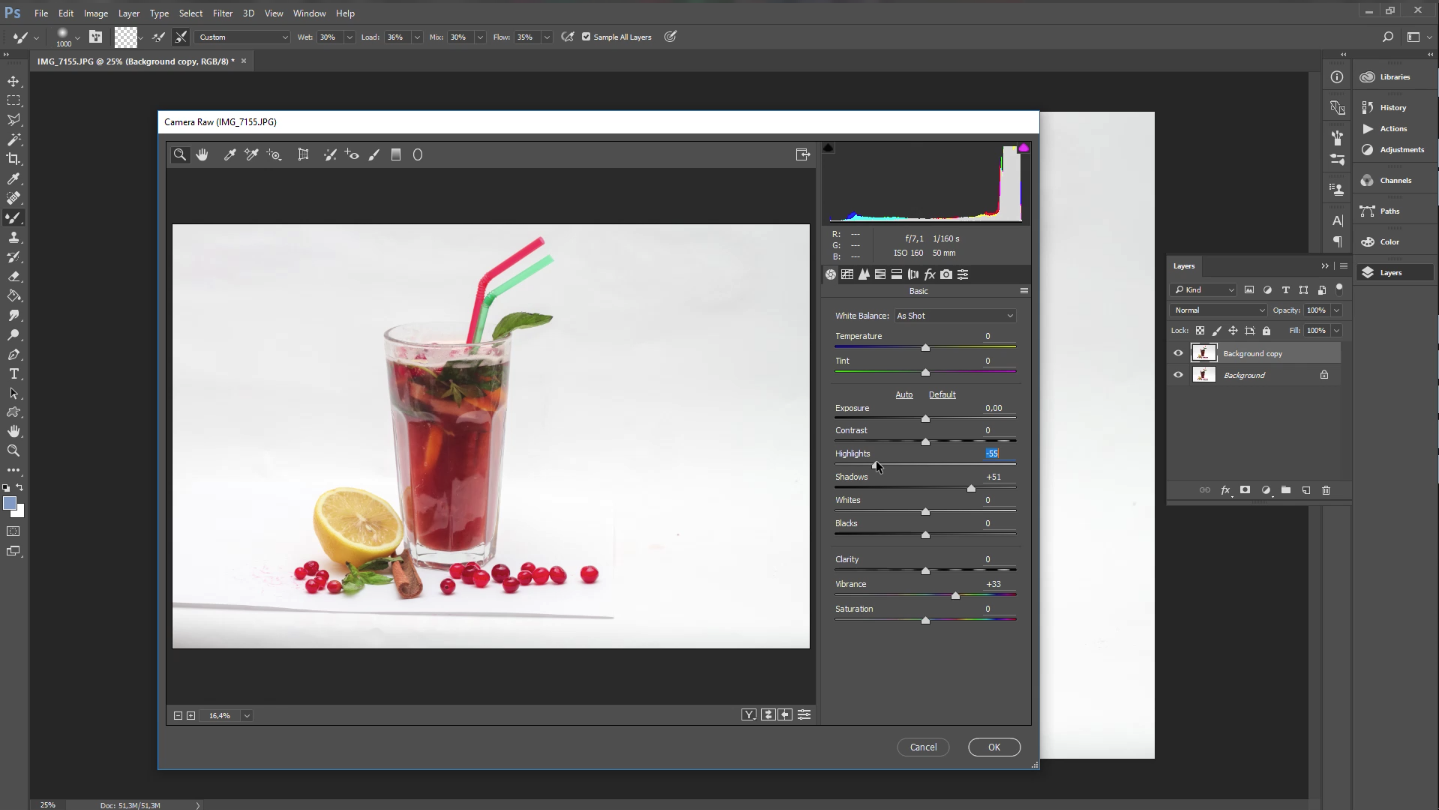
Open Filter > Camera Raw Filter. Set:
Shadows +51
Vibrance +33
Highlights -55
Contrast +18
Click Ok. Create a Background Copy layer. You will want to place the object in the center for convenience.
Step 3. Add a new Layer 1 and make it white. Open the Background Copy, click on Add a vector mask
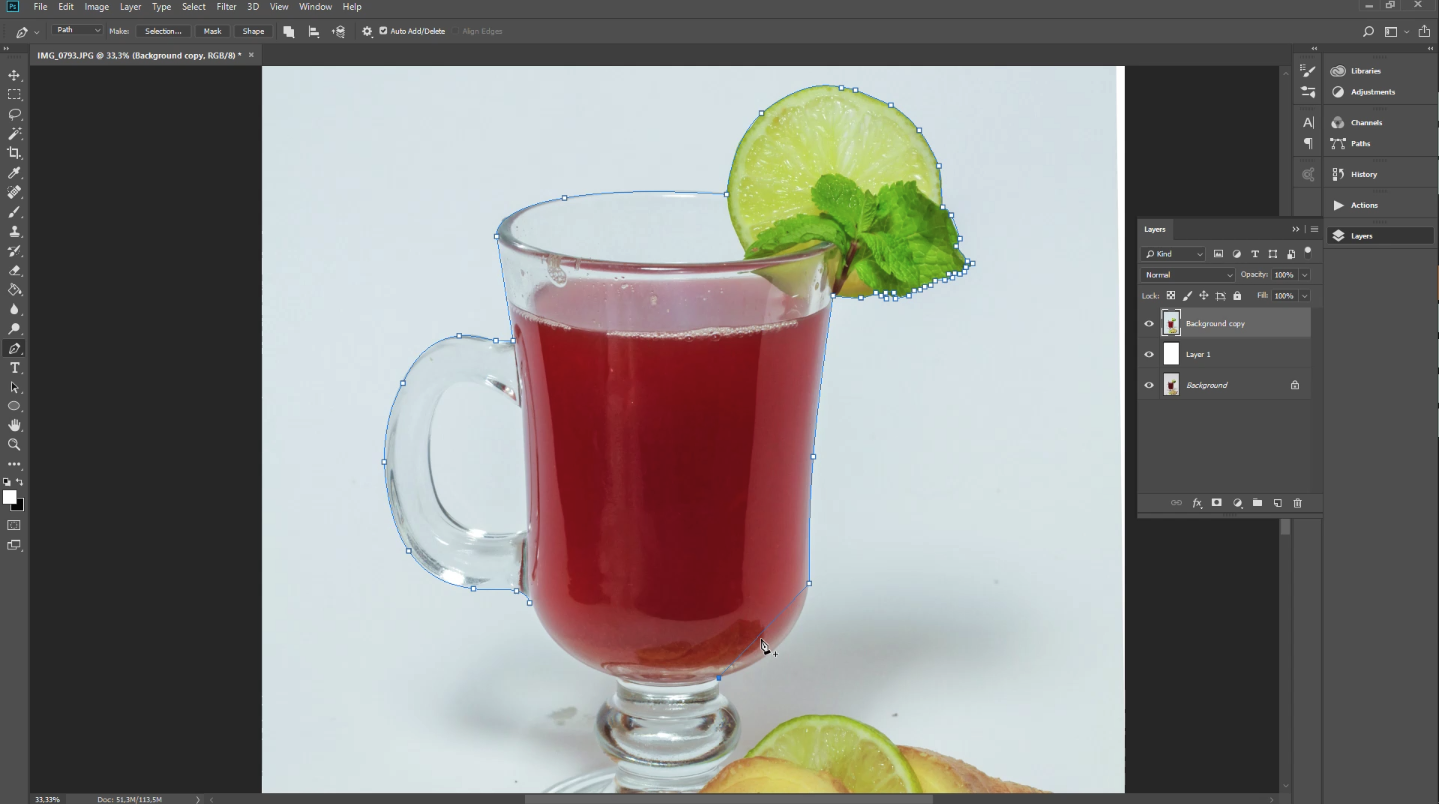
Step 4. Make clipping path. Click on the Pan Tool on the left panel.
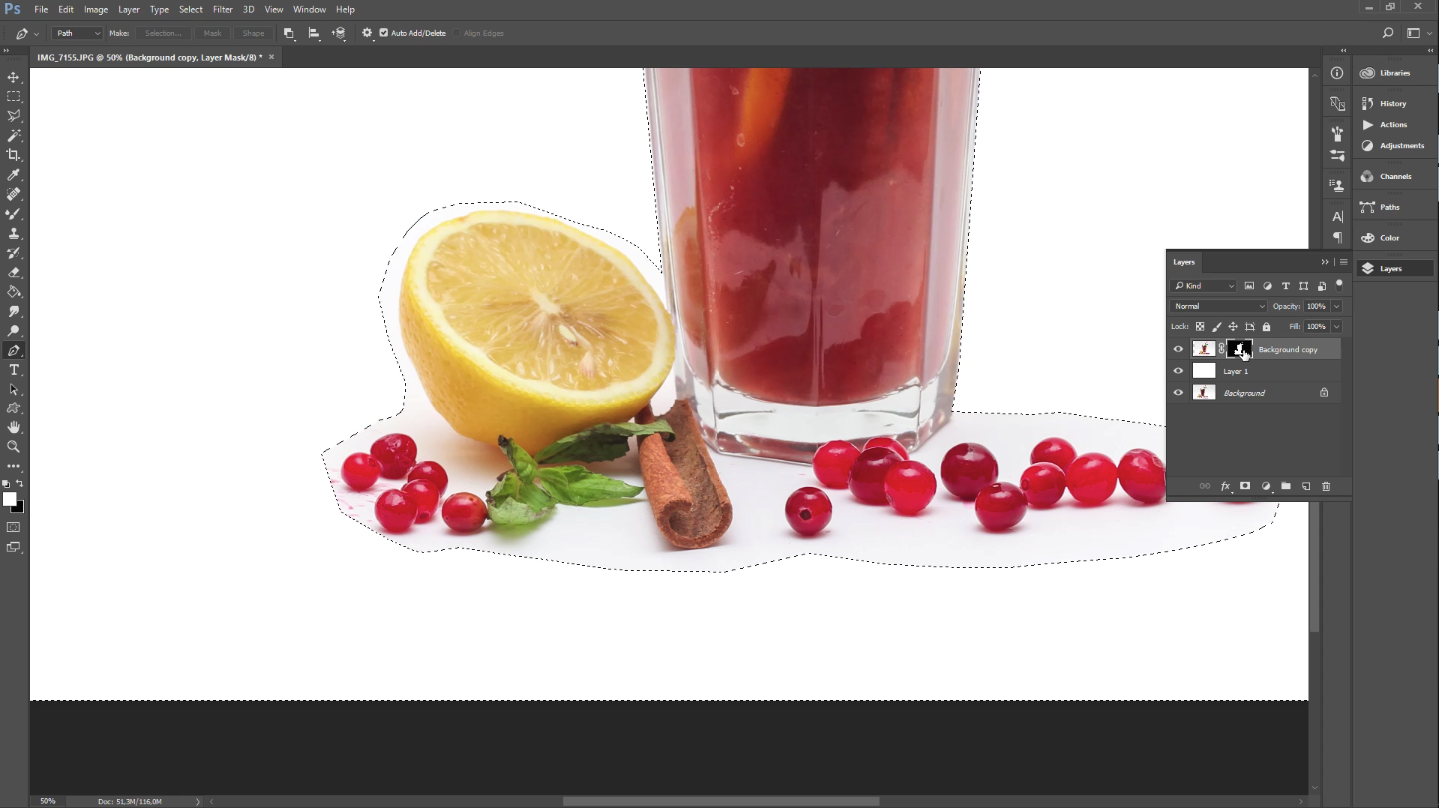
You need to be very accurate when cropping the food so you do not lose any detail. It is best to zoom in on the picture in order to see everything clearly. Hold Ctrl, while selecting tiny pieces. Right-click on the selected object > Make Selection > OK.
Step 5. Place the object on the white background (Layer 1). Choose the small Brush size and make the area around the food pure white. These food photo-editing manipulations will take some time until everything is perfect. Prefer 52% of Flow settings to get a natural white color of the background.
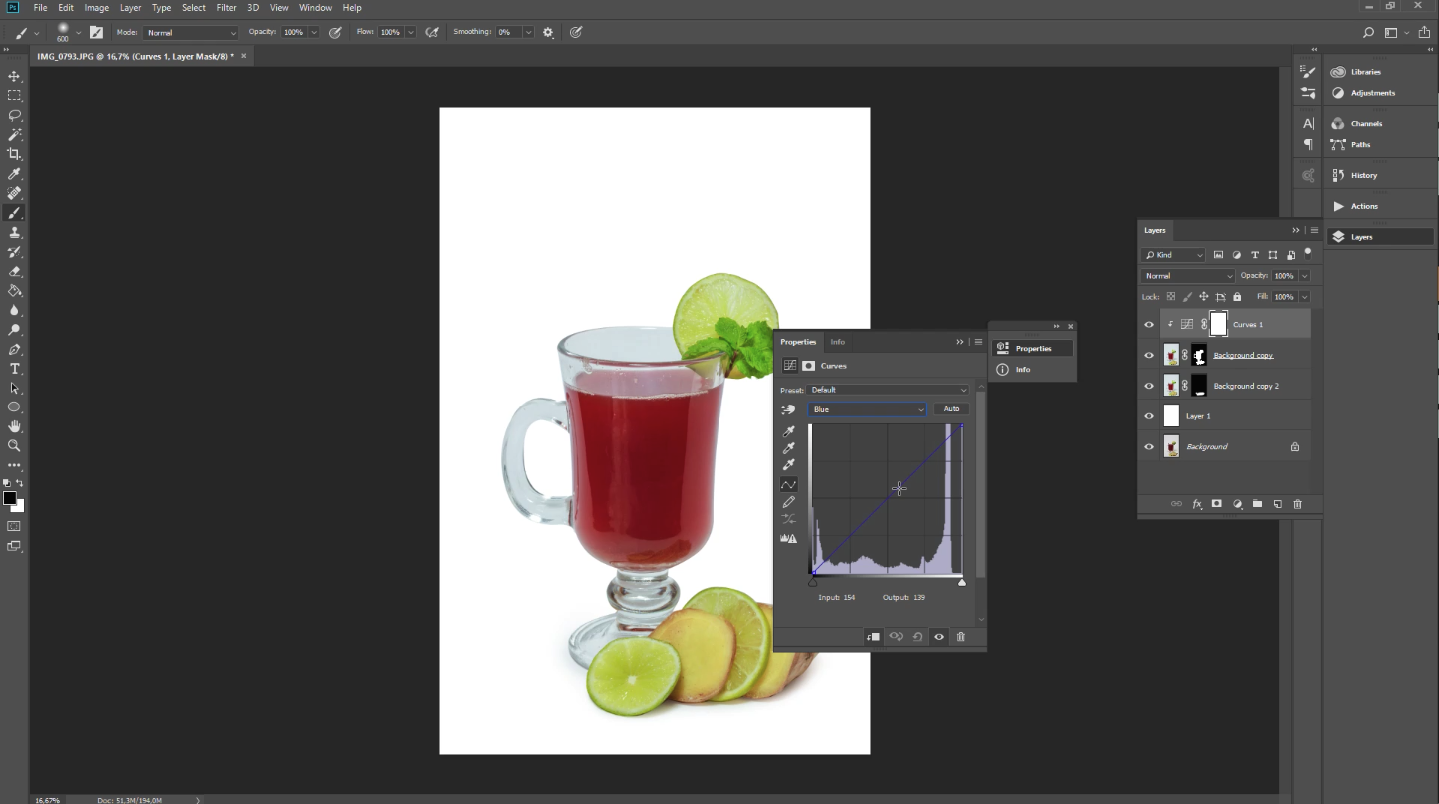
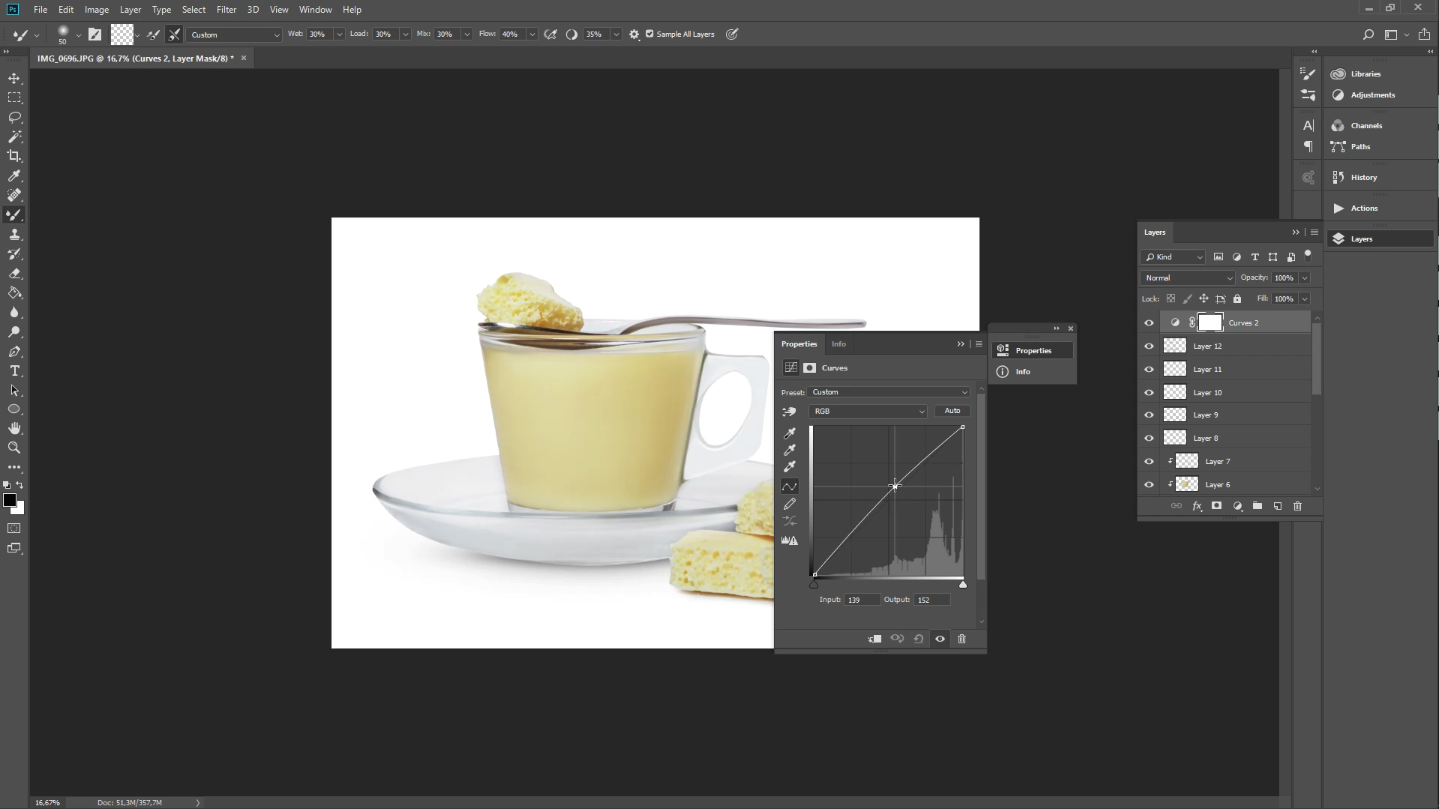
Step 6. Adjust Curves
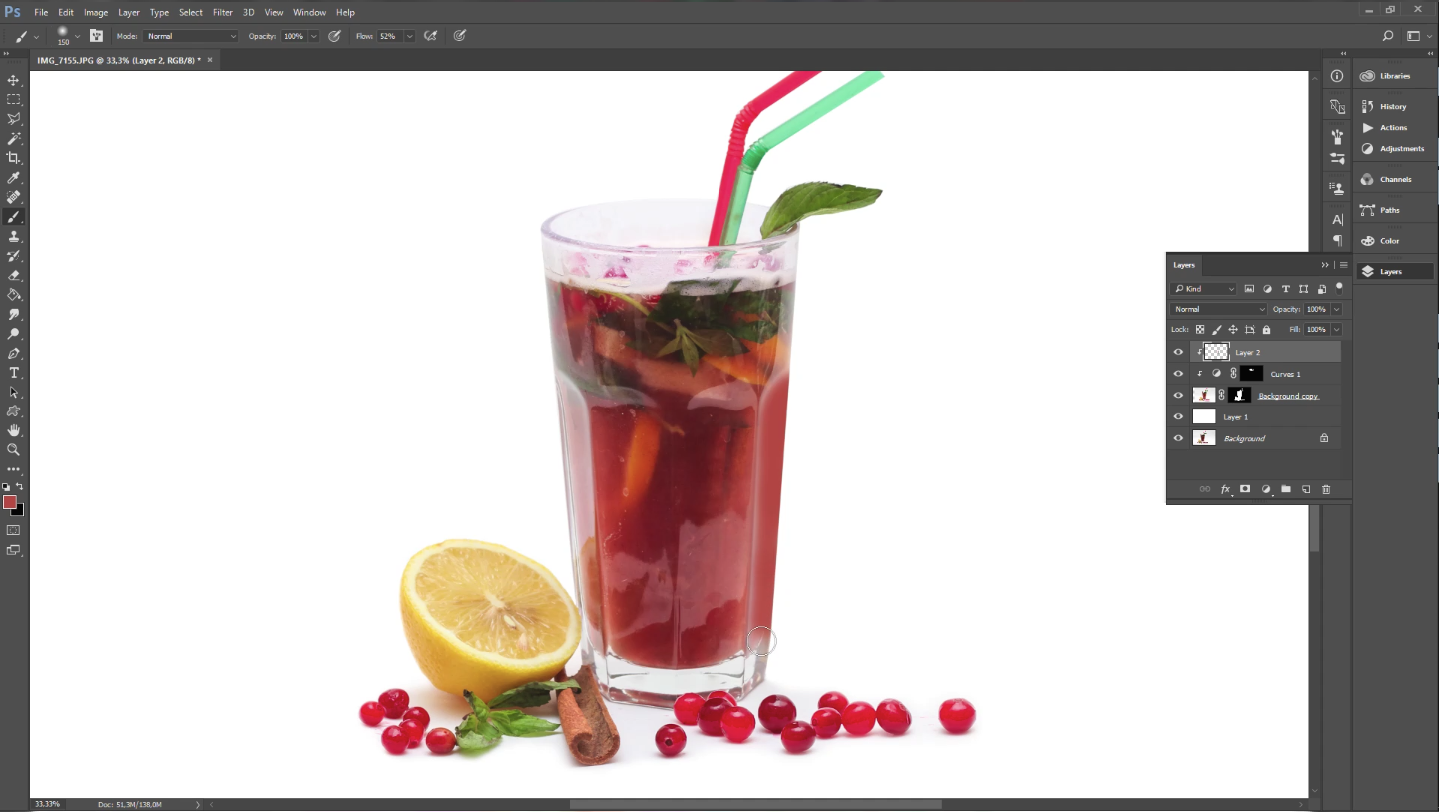
Open Curves > Properties > Choose RGB and drag the Curve several mm to the upper left corner. Repeat the action with Blue, Red, and Green indicators (You can hold Alt+2/3/4/5 to do it).
Step 7. Check the Background Copy > open Layer Mask Properties. It must be totally black.
Step 8. Enhance the colors of the glass and objects.
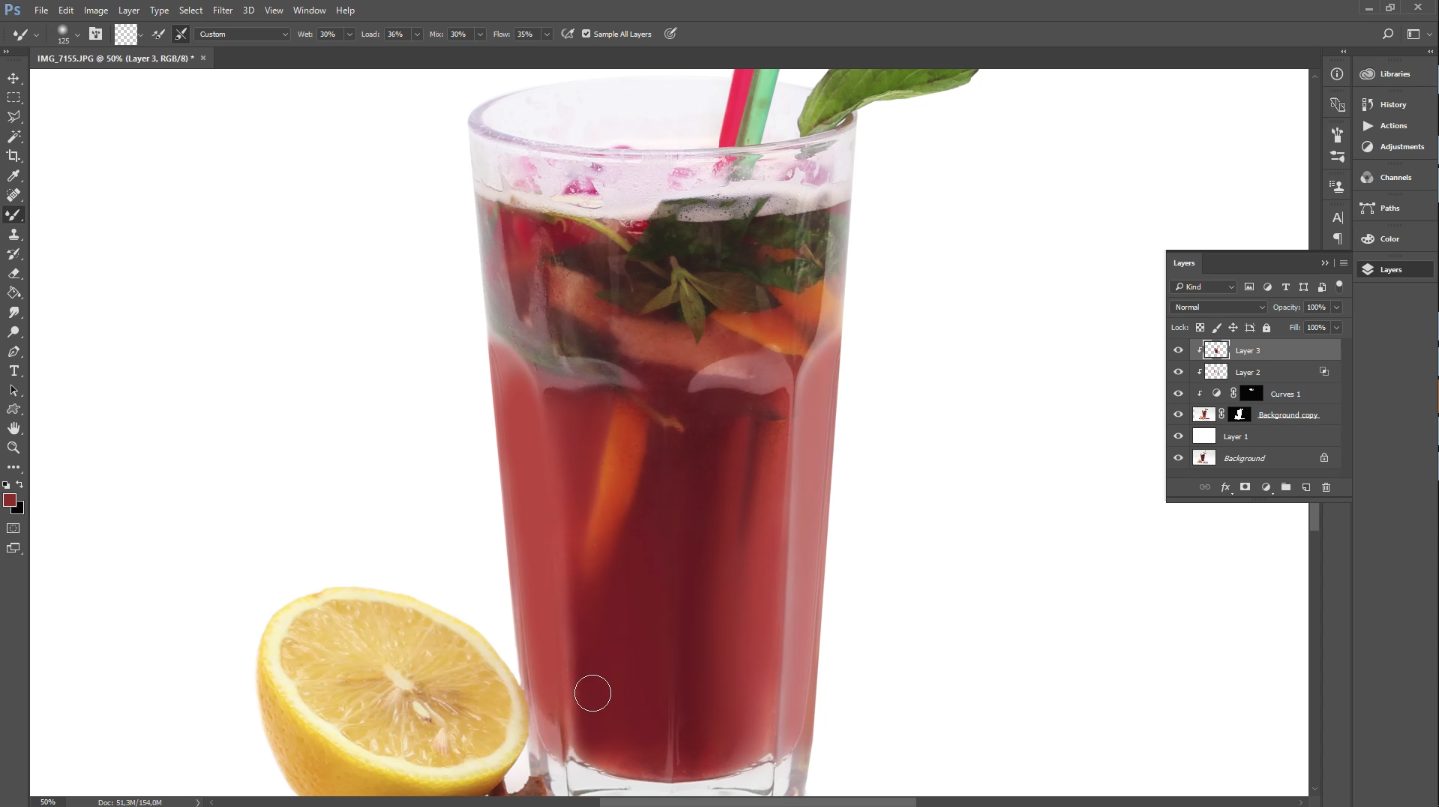
Zoom in the image and choose the suitable Brush size. Make the side parts of the glass red. Turn Normal mode into Soft Light to see how it worked.
Step 9. Activate Color Picker > Choose the appropriate color.
Do the same actions with all the items.
Step 10. Open Photoshop Actions
Choose Clean Vivid Color. Open Layers > Opacity 49%
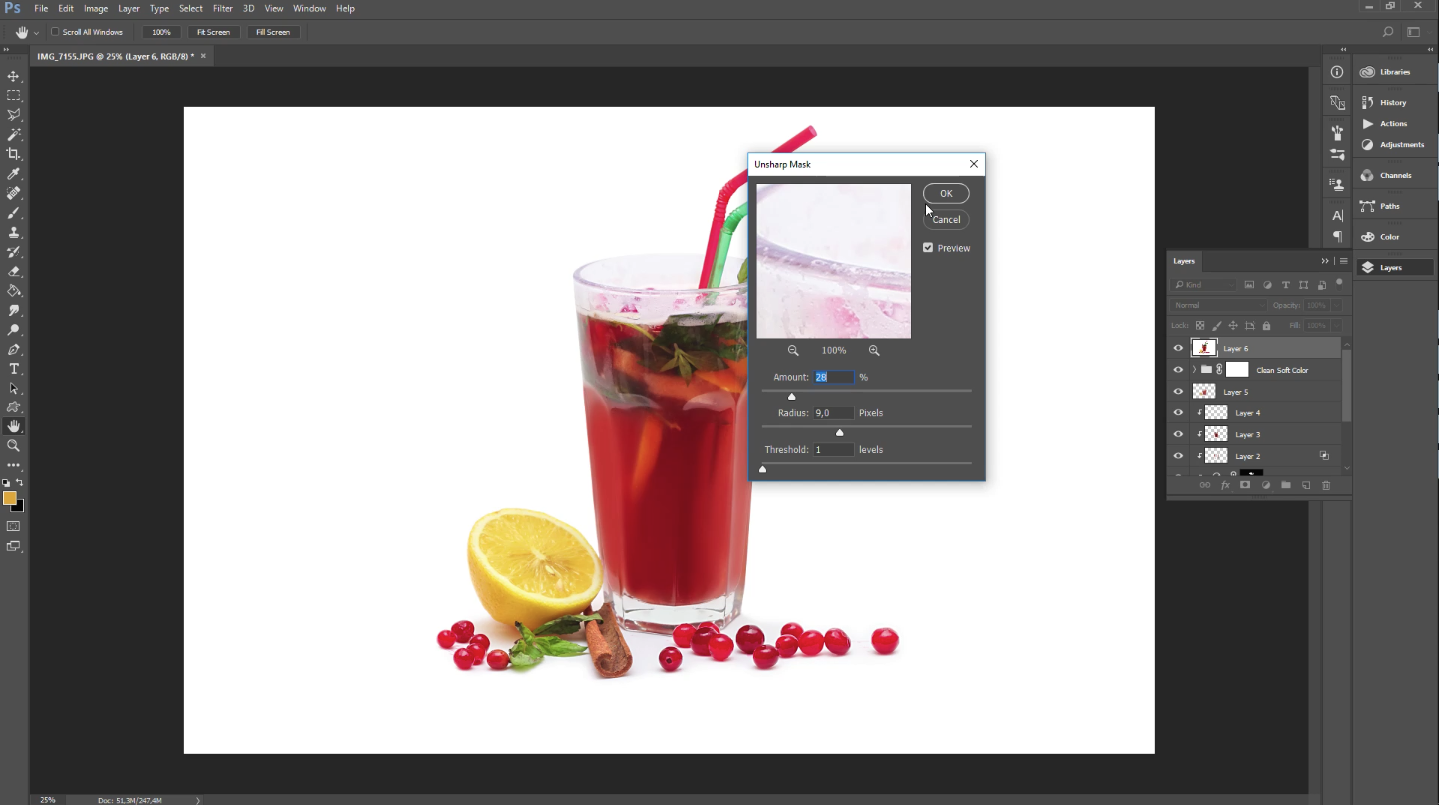
Open Filter > Sharpen > Unsharpen Mask
Check all the problematic areas by zooming on the photo.
Lesson 2
-
- Before
-
- After
Step 1. Create the Background Copy Layer.
Step 2. Open Filter > Camera Raw Filter. In the drop-down menu set:
White Balance – Auto;
Temperature +6
Shadows +61
Vibrance +53
Highlights -53
Tint -11
Clarity +11
Click OK.
Step 3. Create Layer 1 and make it white.
Step 4. Zoom in on the picture and select the food by means of the Pen Tool.
Don’t rush; take your time to do everything accurately.
Step 5. Right-click on the selected area > Make Selection > OK.
Step 6. Place the object on the white background (Layer 1).
Step 7. Work with the handle of the cup. Repeat Step 5.
Step 8. Create the Background Copy 2.
Click on it > Delete Layer Mask. The layer will become black. Choose the black Brush and add shadows.
Step 9. Adjust the Curves.
Step 10. Choose Soft Color in the Actions Window.
Always check the actions applied, clicking on the eye sign.
Step 11. Color Enhancement
Choose the Brush Tool and adjust the size (you may change it for different areas). Work with the colors to make them vivid but natural looking.
Step 12. Use the Eraser to remove the spatter in the glass.
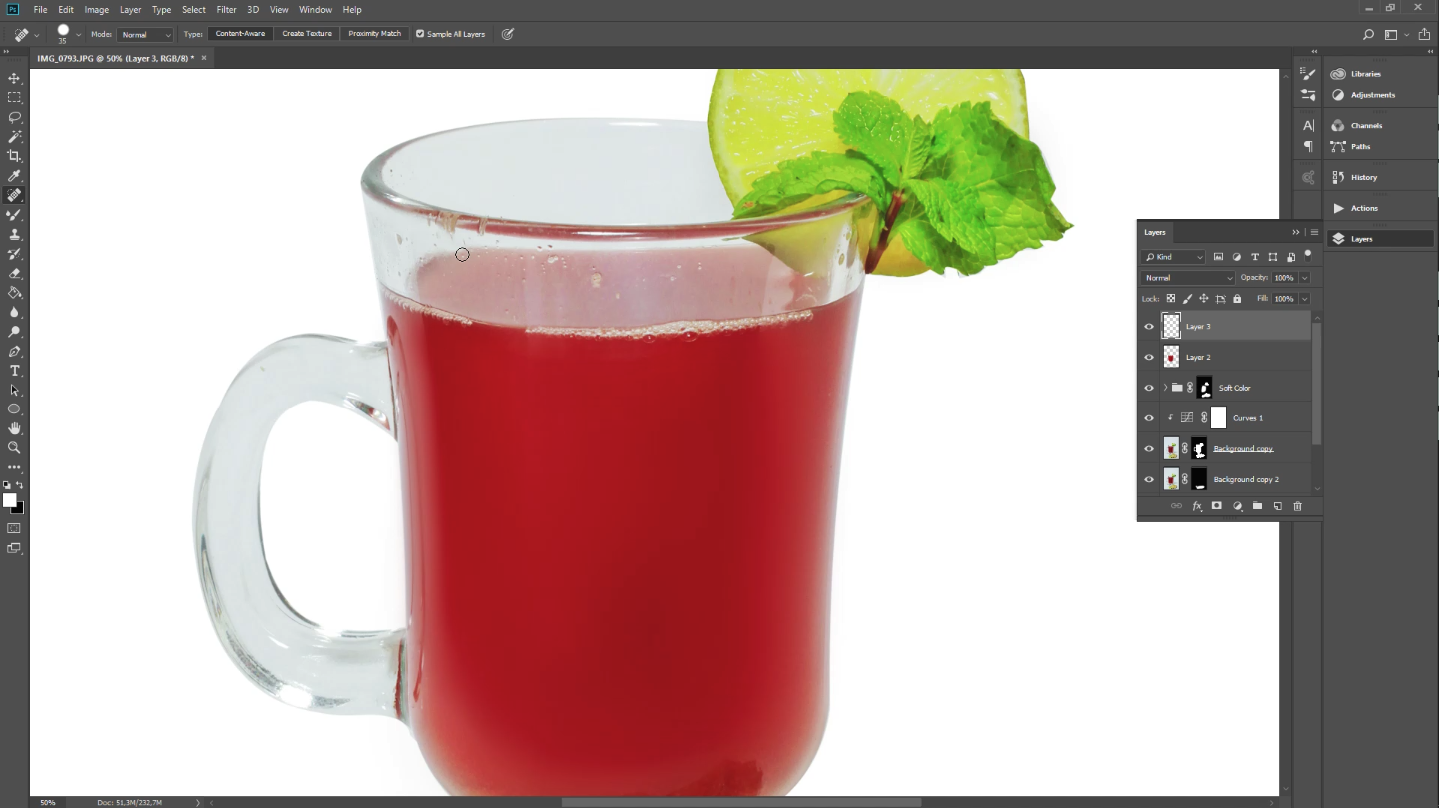
Step 13. Improve the handle.
Take the Brush and paint the bright, highlighted areas. Take the Pan Tool and draw a line on the handle, holding Ctrl.
Right-click > Stroke Path > tick “Simulate Pressure” > OK.
The line will become white. Paint over it.
Step 14. Activate the Gaussian Blur window.
Make Radius 7.0 pixels. Click Ok.
You’ll see a rectangular grid. Adjust the stripes according to the shape of the handle.
Step 15. Use the Brush Tool, enhance the remaining fruit the same way.
Lesson 3
-
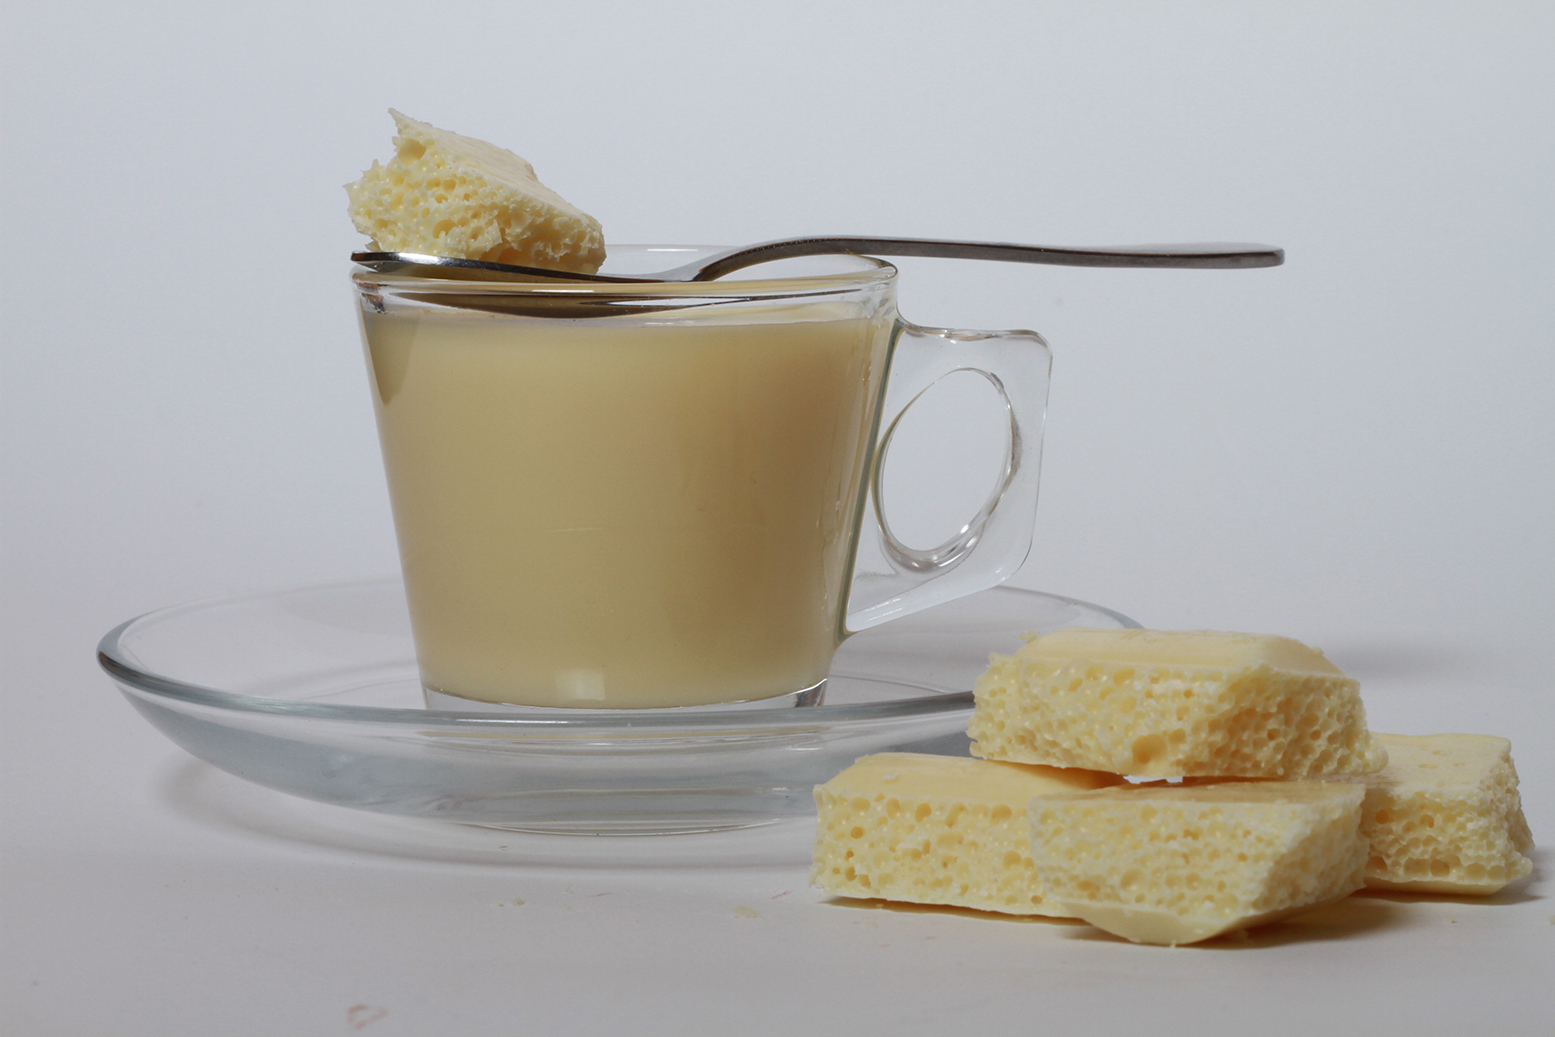
- Before
-
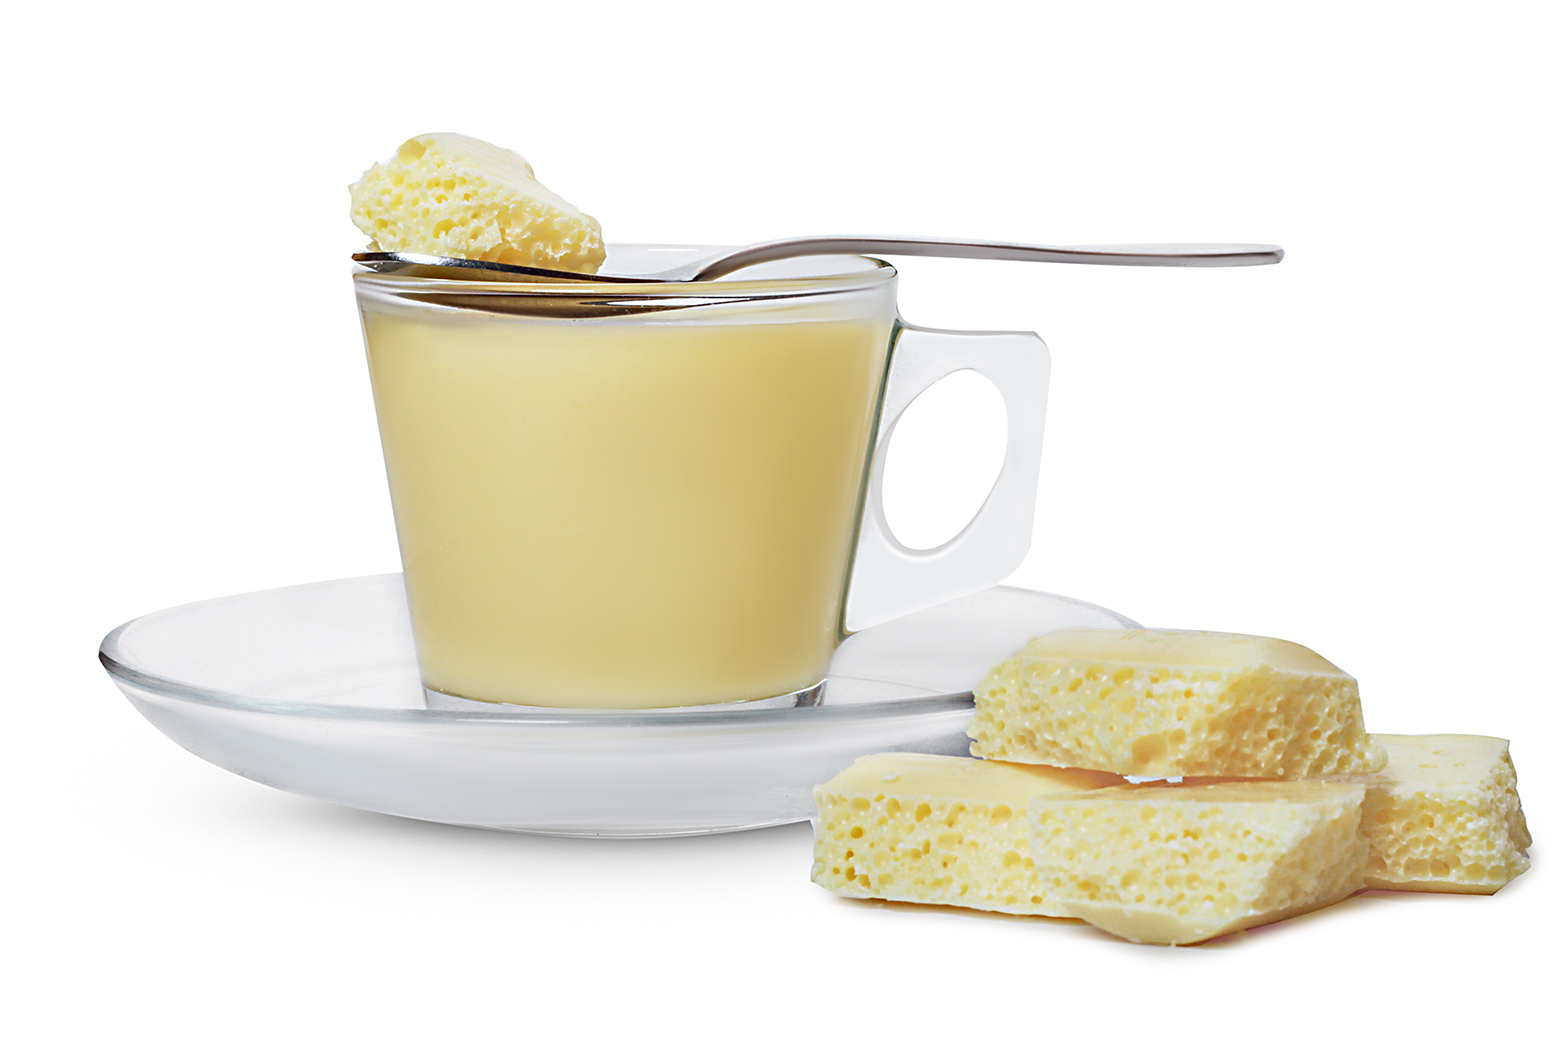
- After
Step 1. Make the Background copy.
Step 2. Adjust basic parameters.
Click Filter > Camera Raw Filter. In the drop-down window choose:
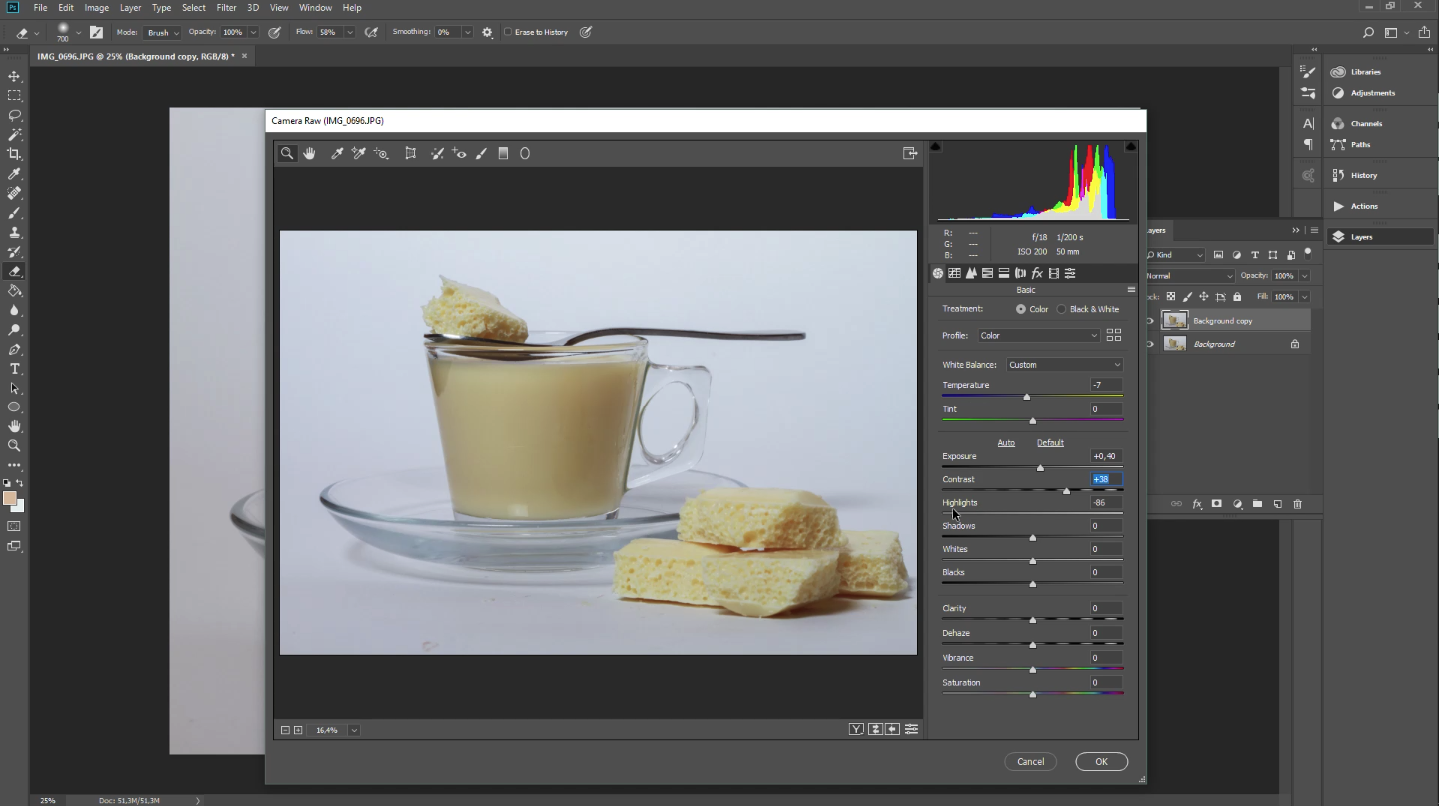
White Balance – Auto;
Temperature -7;
Exposure +0, 40;
Highlights – 86;
Contrast +38;
Shadows +62;
Whites – 4;
Clarity +19;
Dehaze +8;
Vibrance +10.
Click OK.
Step 3. Create Layer 1.
Step 4. Select the object.
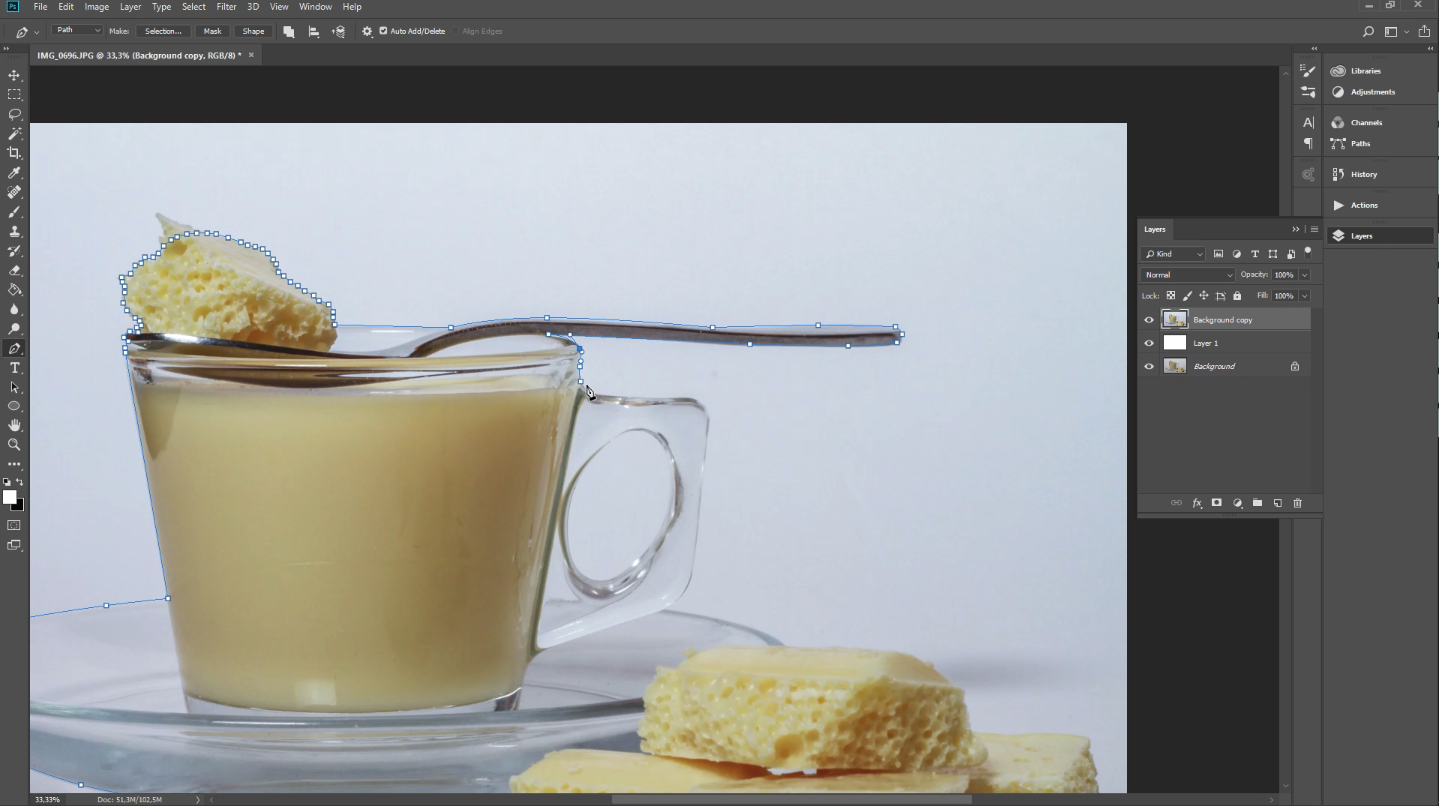
Take the Pan Tool and start selecting the object. There should be no breaks. You may zoom in on the picture while working with the chocolate.
Right-click > Make Selection > OK.
Step 5. Improve the handle.
Select the circle in the handle > right-click > Make Selection > OK. Paint it white.
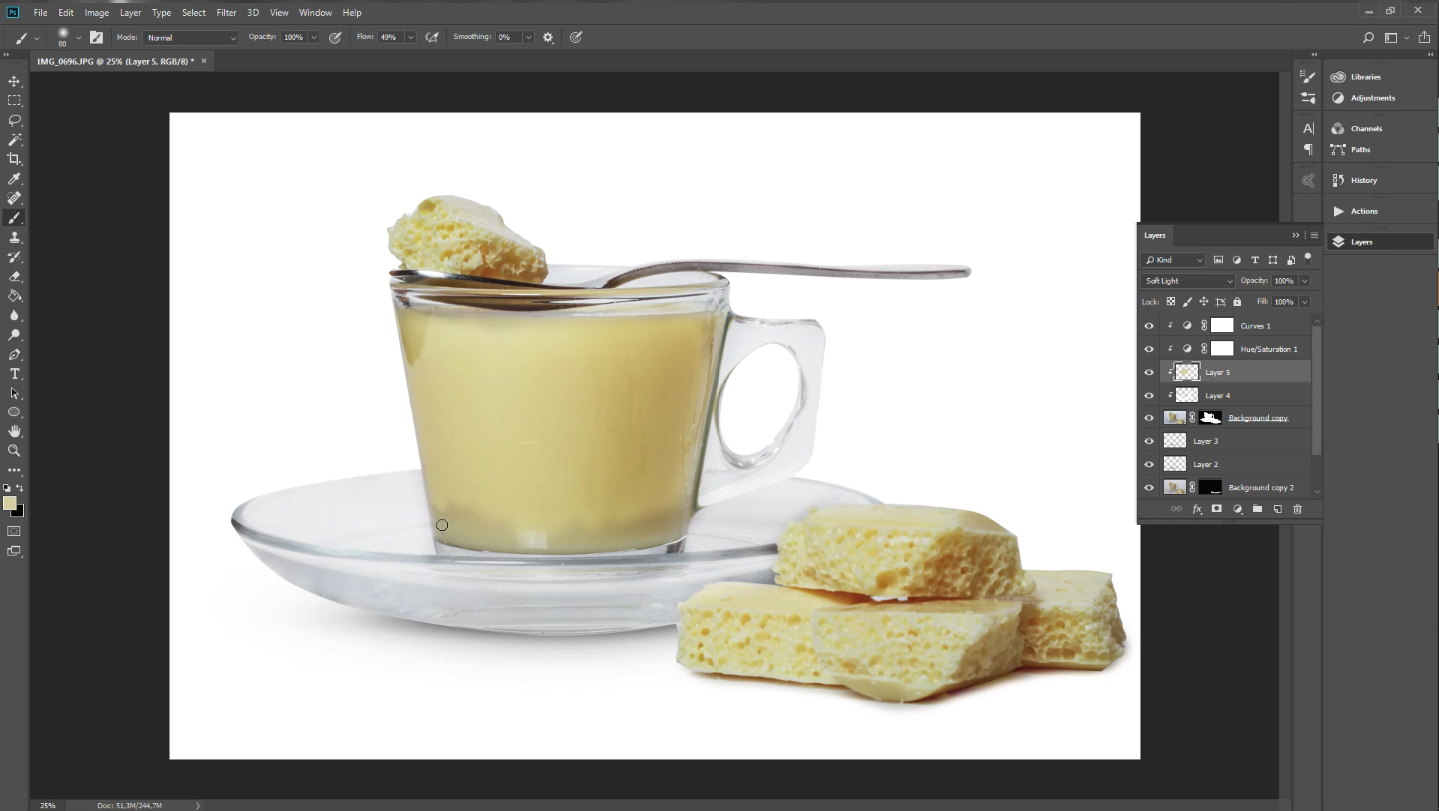
Step 6. Adjust Hue and Saturation
In the Properties window, choose Blues.
Set Saturation – 52, Lightness +66. Click OK.
Now, you’ll have Hue/Saturation 1 Layer.
Step 7. Regulate Curves (Similar to the previous lessons).
Step 8. Create the Background copy 2 Layer.
Step 9. Click anywhere on the white background and you’ll see the Levels window. On the scale move the white slider to 1,39 and the black slider to 17. The channel must be RGB.
Step 10. Take the Brush Tool and make the color of the drink even.
Step 11. Enhance the color of the glass plate and cup.
Right-click > Stroke Path > tick “Simulate Pressure” > OK.
Step 12. Improve the color of the chocolate.
In the Layers window, find a circle (half black, half white) at the bottom. Click on it > Selection Color > Set Blacks – 79 > OK.
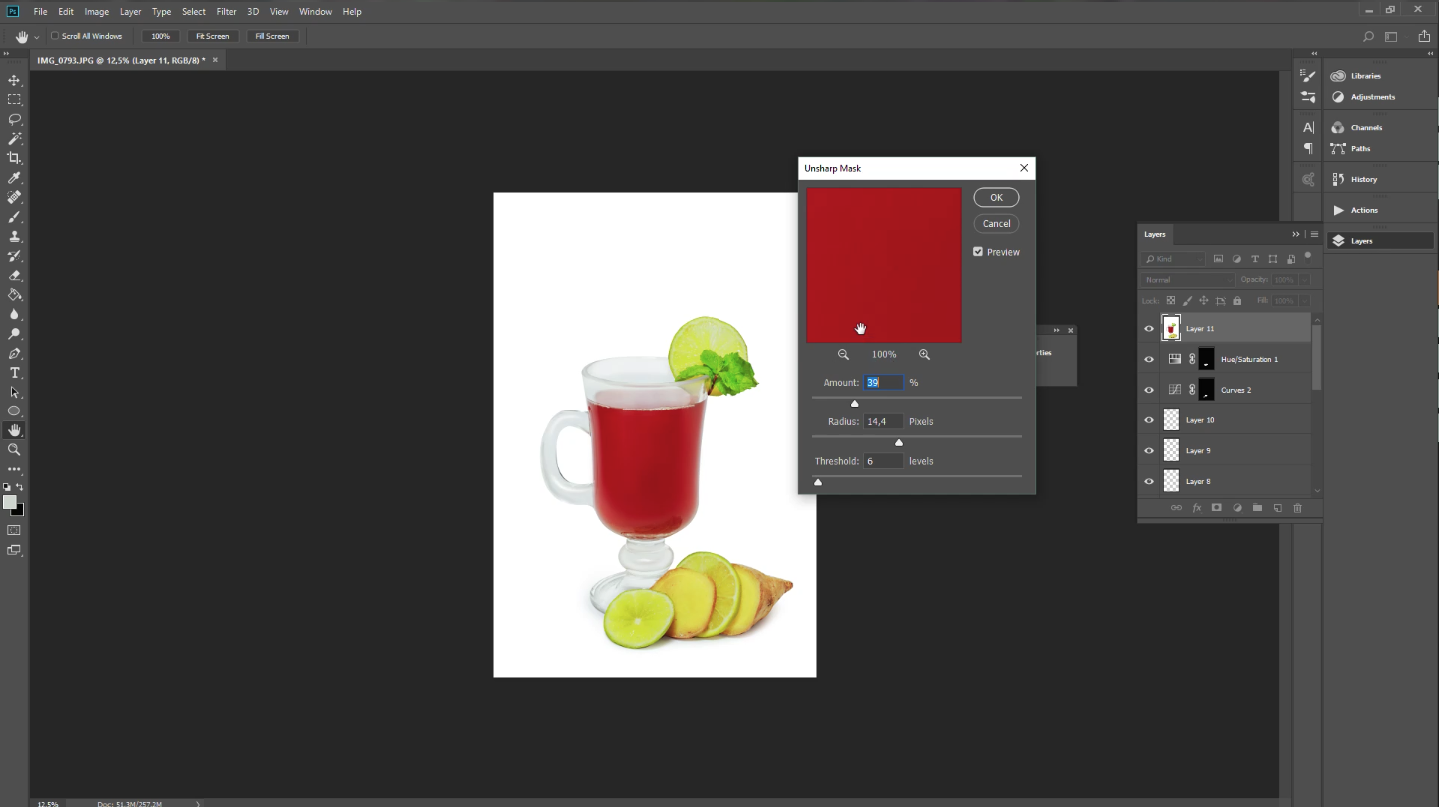
Step 13. Filter > Sharpen > Unsharp Mask
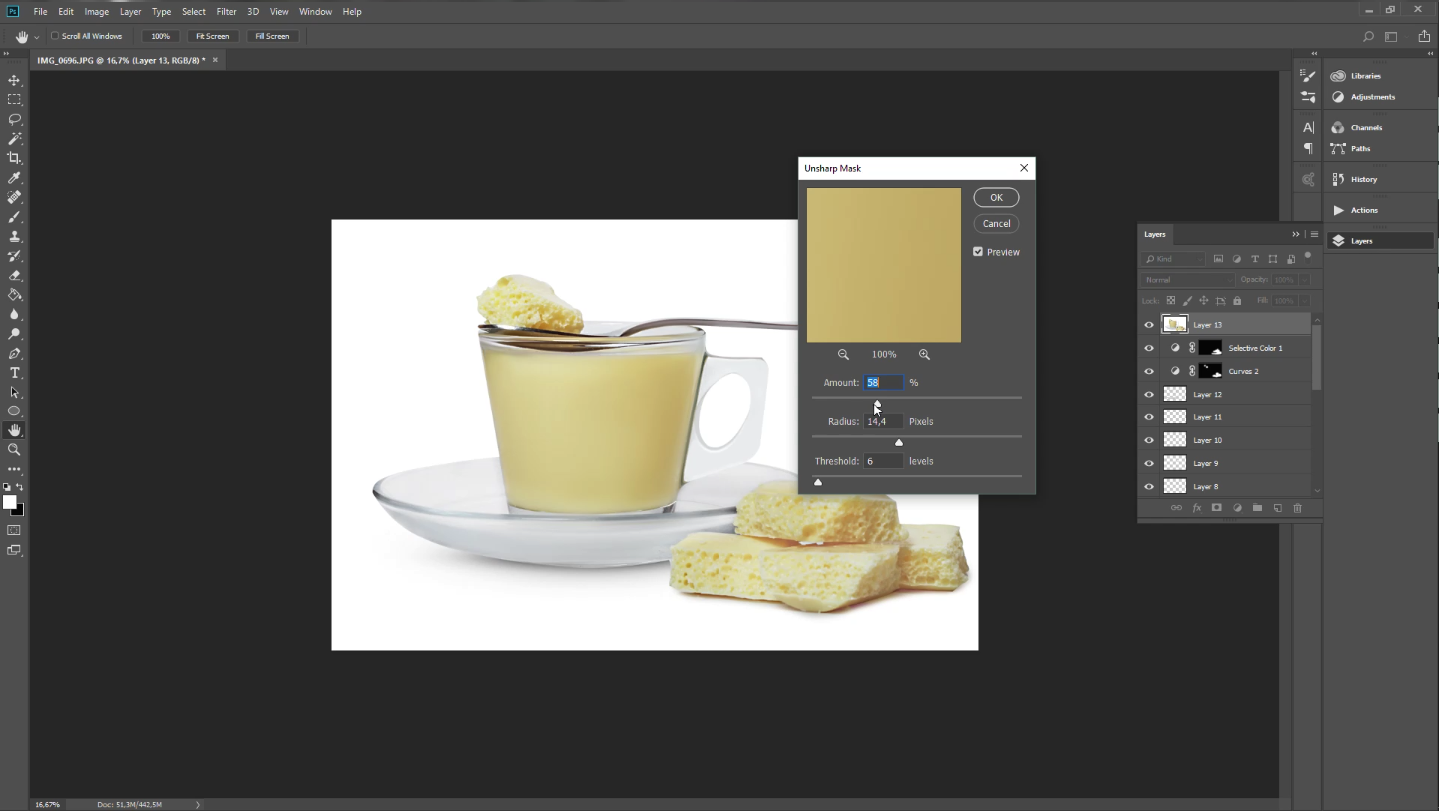
In the drop-down window set the Amount – 58% > OK.
Step 14. Check the actions applied.
Using these food photography-editing tips you can turn dull looking food into bright and crisp images, and what was once tedious work into an enjoyable time. In case you just can’t make it on your own, you can reach out to a reasonably priced and convenient food photography editing service: Fix the Photo .
Food Photography Editing Hacks
If you want to enhance your photos in several clicks without spending time on learning Photoshop or Lightroom tutorials, or you have too many photos to edit, use free Photoshop Actions or Lightroom food presets and make a color correction in 1 click. These free food photography editing tools work for all photo editing software versions. You can also adjust and use them according to your specific needs.
We wish you many, yummy and mouthwatering food photos!
Leave a Reply to Saesha Walia Cancel reply